# Sử dụng client
X-OR Cloud Storage có thể tương thích với nhiều client tool như: S3CMD, MC (command line for linux/unix), CyberDuck (software for Mac & Windows)
Bạn cần:
* Cài đặt client tool trên một máy tính/máy chủ
* Tạo tài khoản và tạo bucket trên X-OR Cloud Portal
* Lấy Access Key & Secret key của bucket
**Bước 1: Lấy cặp Access Key & Secret key**
Truy cập đường dẫn [https://data.x-or.cloud/](https://data.x-or.cloud) lấy cặp Access Key & Secret Key dùng trong việc kết nối:
**Bước 2: Thực hiện việc configure các tool theo thông tin như bên dưới**
Các trường **Access Key** và **Secret Key** được thay bằng thông tin lấy tại bước 1
* **Tool S3CMD (command line for linux/unix)**
– Cài đặt:\
CentOS/RHEL:\
\&#xNAN;***$ sudo yum install s3cmd -y***
Ubuntu/Debian:\
\&#xNAN;***$ sudo apt-get install s3cmd***
MacOS:\
\&#xNAN;***$ brew install s3cmd***
– Edit cấu hình file config: **\~/.s3cfg**
```s
[default]
access_key = UV5GNSEGE31H619C138C
bucket_location = hn1
host_base = s3.xorcloud.net
host_bucket = s3.xorcloud.net
secret_key = fjEK04YtZddX8RJXXXXXXXXXX
use_https = True
```
Một số thao tác cơ bản:
* List các bucket\
\&#xNAN;***$ s3cmd ls***
2019-11-01 03:42 s3://bucket-1
* Upload file to bucket:
***$ s3cmd put file.txt s3://bucket-1***
– Lưu ý:
* Khi upload có thể sẽ xảy ra lỗi khi file hoặc folder có dấu cách (sapce), log khi upload file có thể xảy ra
```s
ERROR: S3 error: 403 (SignatureDoesNotMatch)
```
* Nguyên nhân của lỗi này là do lỗi của s3cmd ở phiên bản < 2.0.0 xử lý file có dấu sách không đúng.
* Cách khắc phục :
Có 2 cách để khắc phục việc này
* 1. Thêm vào file config s3cfg dòng sau
```s
signature_v2 = True
```
* 2. Cài đặt phiên bản s3cmd từ bản 2 trở lên bằng từ source
```s
wget https://sourceforge.net/projects/s3tools/files/s3cmd/2.0.0/s3cmd-2.0.0.tar.gz
cd s3cmd-2.0.0
python setup.py install
Sau đó kiểm tra lại bằng lệnh
s3cmd --version
Các phiên bản mới hơn của s3cmd có thể tìm thấy ở đây
https://github.com/s3tools/s3cmd/releases
```
***
* **Tool MC (command line for linux/unix)**
– Cài đặt:\
\&#xNAN;***$ wget*** [***https://dl.min.io/client/mc/release/linux-amd64/mc***](https://dl.min.io/client/mc/release/linux-amd64/mc)\
\&#xNAN;***$ sudo chmod +x mc***\
\&#xNAN;***$ ./mc –help***
– Updates file config **\~/.mc/config.json**
```s
{
"version": "9",
"hosts": {
"s3": {
"url": "https://s3.xorcloud.net",
"accessKey": "UV5GNSEGE31H619C138C",
"secretKey": "fjEK04YtZddX8RJtroxxxxxxxxxxxxxxxx",
"api": "s3v4",
"lookup": "auto"
}
}
}
```
* List bucket\
\&#xNAN;***$ ./mc ls s3***\
\&#xNAN;*\[2019-11-01 10:42:36 +07] 0B bucket-1/>*
* Upload file to bucket\
\&#xNAN;***$ ./mc cp myobject.txt s3/bucket-1***
* **Cyberduck (for Mac and Windows)**
– Cài đặt:\
Tải Cyberduck về và cài đặt:
– Cấu hình:\
Dùng notepad tạo một file cấu hình, đặt tên là **xor-cloud-s3.cyberduckprofile** (tên có thể bất kỳ nhưng phải có đuôi .cyberduckprofile) có nội dung như sau:
```s
Protocols3Vendors3-aws2-httpsSchemehttpsDescriptionX-OR Cloud Storage (HTTPS)Default Port443Hostname ConfigurablePort ConfigurableUsername ConfigurableAuthorizationX-OR Cloud
```
Run file bằng click đúp= Tại giao diện cyberduck, chọn **Open connection**:
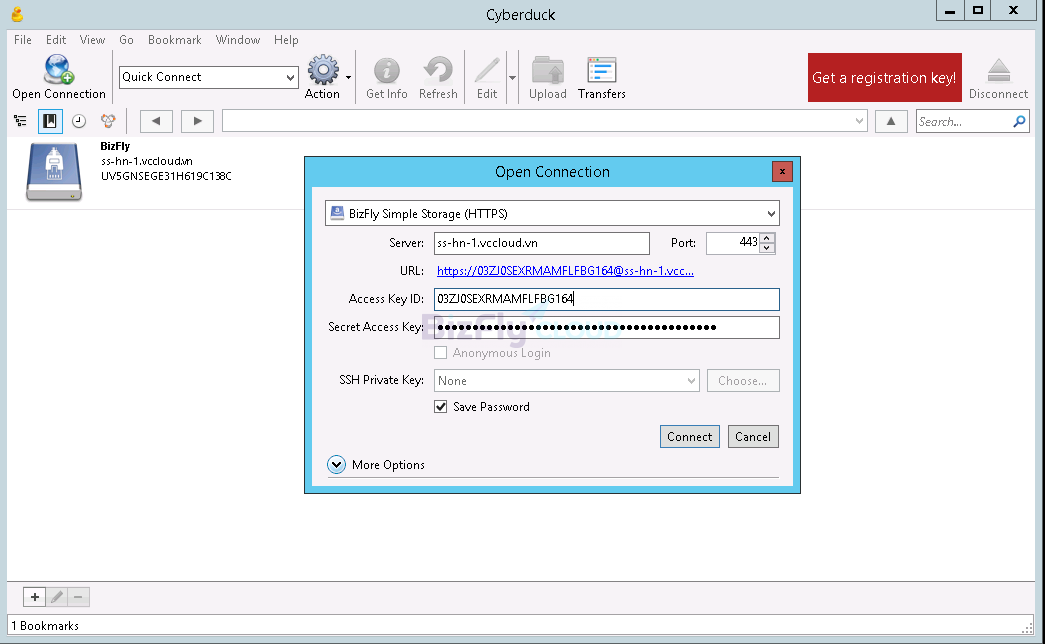
**Profile**: lựa chọn X-OR Cloud S3 Storage (HTTPS)\
**Servers**: s3.xorcloud.net\
**Access Key ID**: nhập Access Key ID lấy ở bước 1\
**Secret Access Key**: nhập Secret Key lấy ở bước 1
Chọn **Save Password** nếu muốn lưu lại mật khẩu, ấn **Connect** để kết nối\
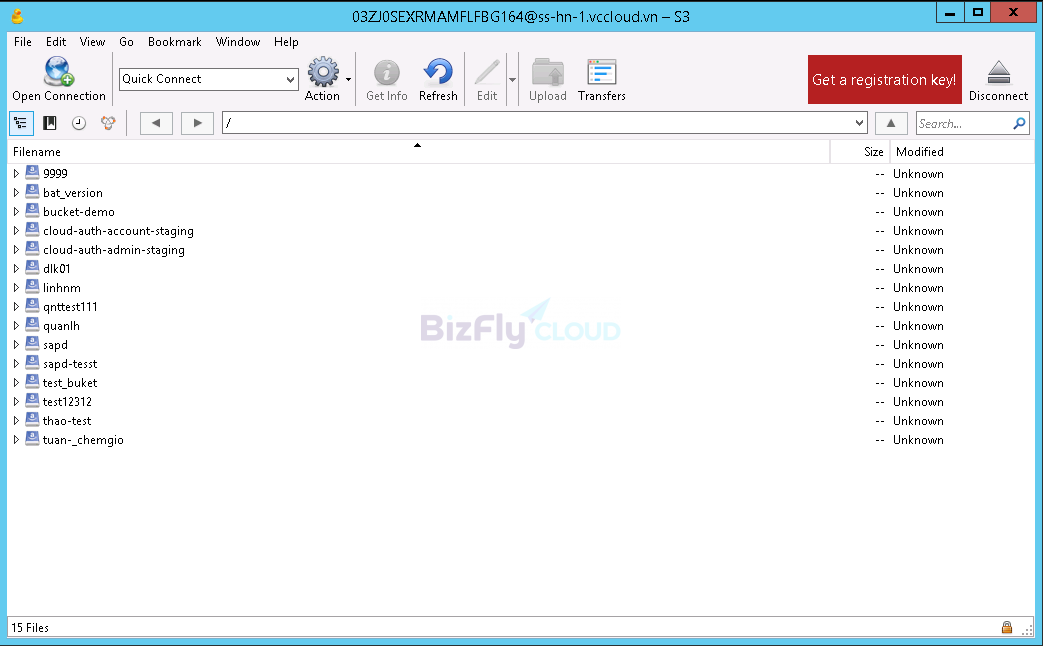
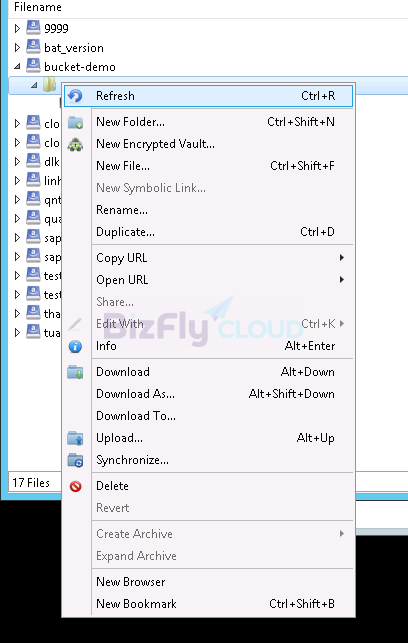
Sau khi đã kết nối thành công, giao diện cyberduck sẽ hiển thị các bucket đang có trong tài khoản. Bạn hoàn toàn có thể download, upload, tạo mới…folder và file
Các folder và file tải về nằm trong thư mục **Downloads** của user chạy cyberduck.
* **Tool aws-cli (command line for linux/unix/windows)**
– Cài đặt:
Linux:
```s
curl "https://awscli.amazonaws.com/awscli-exe-linux-x86_64.zip" -o "awscliv2.zip"
unzip awscliv2.zip
sudo ./aws/install
```
Windows:
* Mở cmd của windows và gõ lệnh
```s
msiexec.exe /i https://awscli.amazonaws.com/AWSCLIV2.msi***
```
* Kiểm tra aws-cli đã được cài đặt bằng cách gõ lệnh sau ở cửa sổ cmd
```s
aws --version
```
– Cấu hình tạo profile mới với tên là bizfly-s3
* Thực hiện lệnh
```s
aws configure --profile=xor-cloud-s3
```
* Điền thông access key và secret key của tài khoản lấy ở bước 1 và output là json
```s
AWS Access Key ID [None]: 3K1UN991WP0xxxxxx
AWS Secret Access Key [None]: DVDV1Y6zVtPNHG1xxxxx
Default region name [None]:
Default output format [None]: json
```
* Các câu lệnh của aws-cli sẽ cần thêm tham số
***–profile=xor-cloud-s3 –endpoint=***
* Ví dụ như câu lệnh list các bucket
```s
aws --profile=xor-cloud-s3 --endpoint=https://s3.xorcloud.net s3 ls
```
* Có thể thêm alias như sau để tiện hơn cho việc gõ lệnh
***alias aws-xor=“aws –profile=xor-cloud-s3 –endpoint=***
* Khi đó lệnh list các bucket ngắn gọn hơn
```s
aws-xor s3 ls
```
---
# Agent Instructions: Querying This Documentation
If you need additional information that is not directly available in this page, you can query the documentation dynamically by asking a question.
Perform an HTTP GET request on the current page URL with the `ask` query parameter:
```
GET https://docs.x-or.cloud/san-pham/x-or-data/huong-dan/su-dung-client.md?ask=
```
The question should be specific, self-contained, and written in natural language.
The response will contain a direct answer to the question and relevant excerpts and sources from the documentation.
Use this mechanism when the answer is not explicitly present in the current page, you need clarification or additional context, or you want to retrieve related documentation sections.