X-OR Cloud
  • ☁️Giới Thiệu
  • ℹ️Điều khoản dịch vụ
    • Cam kết chất lượng dịch vụ - SLA
    • Chính sách bảo vệ thông tin cá nhân
    • Chính sách thanh toán
    • Cơ chế tiếp nhận và giải quyết khiếu nại
    • Các điều khoản về quyền riêng tư
    • Điều khoản sử dụng dịch vụ
  • 🚀Sản phẩm
    • X-OR Cloud
      • X-OR Cloud Kubernetes Engine
        • Hướng dẫn sử dụng
      • X-OR Cloud Elastic IP
        • Hướng dẫn sử dụng
      • X-OR Cloud Elastic Load Balancer
        • Hướng dẫn sử dụng
      • X-OR Cloud VPC
        • Hướng dẫn sử dụng
      • X-OR Cloud Backup
        • Hướng dẫn sử dụng
      • X-OR Cloud Image Management
      • X-OR Cloud Elastic Volume
      • X-OR Cloud Auto Scaling
      • X-OR Cloud Elastic Compute
        • Hướng dẫn sử dụng
    • X-OR AI
      • Hướng dẫn
        • Mua gói GPU Container
        • Quản lý Container
    • X-OR Data
      • Bắt đầu
      • Hướng dẫn
        • Mua gói Object Storage
        • Quản lý Bucket
        • Tích hợp Wordpress
        • Sử dụng client
        • Đồng bộ dữ liệu từ sử dụng tool s3sync
        • Tích hợp Object Storage với Javascript
        • Tích hợp Object Storage với Java
        • Tích hợp Object Storage với Go
        • Tích hợp Object Storage với PHP
        • Tích hợp Object Storage với C#
        • Tích hợp Object Storage với NodeJS
        • Sử dụng s3 browser
        • Sử dụng với Object Manager tại X-OR
        • Bật xác thực 2FA
        • Sử dụng MinIO Client
        • Sử dụng rclone
      • FAQs
        • Object Storage là gì?
        • Lợi ích Object Storage mang lại?
        • Có thể thay đổi tên Bucket không?
        • Vì sao không xóa được Bucket?
    • X-OR Stack
  • 🌟Giải pháp
    • Quản lý và chia tài liệu trong doanh nghiệp
    • Sao Lưu Dữ Liệu Đảm Bảo An Toàn và Phục Hồi Nhanh Chóng
    • Giải pháp Backup & Recovery cho Windows Server sử dụng Veeam và Object Storage
  • 📗Tutorials
    • XOR Cloud - Portal
      • Kubernetes
      • Keypair
      • Elastic IP (Public IP)
      • Elastic Compute (Cloud Server)
      • Virtual Private Cloud
    • Linux Basics
      • Hướng dẫn cơ bản về Dòng lệnh Linux
    • JavaScript
      • Cách sử dụng Bảng điều khiển dành cho nhà phát triển JavaScript
      • Cách viết chương trình JavaScript đầu tiên của bạn
      • Cách thêm JavaScript vào HTML
    • React
      • How To Set Up a React Project with Create React App
      • How To Create React Elements with JSX
      • How To Create Custom Components in React
    • NodeJS
      • What is Node.js?
      • Node JS Environment Setup - Node.js installation
      • How To Use Node.js Modules with npm and package.json
    • Python
      • How to Install Python on Windows 10
      • Python Variables
      • Conditional Statements in Python
    • Database
    • NextCloud
      • Hướng dẫn dùng trên giao diện Web
        • Files
        • Lưu trữ bên thứ 3
      • Hướng dẫn sử dụng trên PC ( Windows )
    • Multiple PXE Server On Cloud
    • Storware
      • Cài đặt
    • Window Server Basics
      • Hướng dẫn bảo mật Windows Server cơ bản
    • Tự động sao lưu cơ sở dữ liệu lên Object Storage tại X-OR Cloud
    • Cài đặt và thiết lập Backup File trên Windows Server lên Object Storage sử dụng Veeam
Powered by GitBook
On this page
  • Introduction
  • Adding JavaScript into an HTML Document
  • Working with a Separate JavaScript File
  • Conclusion
  1. Tutorials
  2. JavaScript

Cách thêm JavaScript vào HTML

Last updated 1 year ago

JavaScript, also abbreviated to JS, is a programming language used in web development. As one of the core technologies of the web alongside HTML and CSS, JavaScript is used to make webpages interactive and to build web apps. Modern web browsers, which adhere to common display standards, support JavaScript through built-in engines without the need for additional plugins.

When working with files for the web, JavaScript needs to be loaded and run alongside HTML markup. This can be done either inline within an HTML document or in a separate file that the browser will download alongside the HTML document.

This tutorial will go over how to incorporate JavaScript into your web files, both inline into an HTML document and as a separate file.

You can add JavaScript code in an HTML document by employing the dedicated HTML tag <script> that wraps around JavaScript code.

The <script> tag can be placed in the <head> section of your HTML or in the <body> section, depending on when you want the JavaScript to load.

Generally, JavaScript code can go inside of the document <head> section in order to keep them contained and out of the main content of your HTML document.

However, if your script needs to run at a certain point within a page’s layout — like when using document.write to generate content — you should put it at the point where it should be called, usually within the <body> section.

Let’s consider the following blank HTML document with a browser title of Today's Date:

index.html

<!DOCTYPE html>
<html lang="en-US">
 
<head>
    <meta charset="UTF-8">
    <meta name="viewport" content="width=device-width, initial-scale=1">
    <title>Today's Date</title>
</head>
 
<body>
 
</body>
 
</html>

Right now, this file only contains HTML markup. Let’s say we would like to add the following JavaScript code to the document:

let d = new Date();
alert("Today's date is " + d);

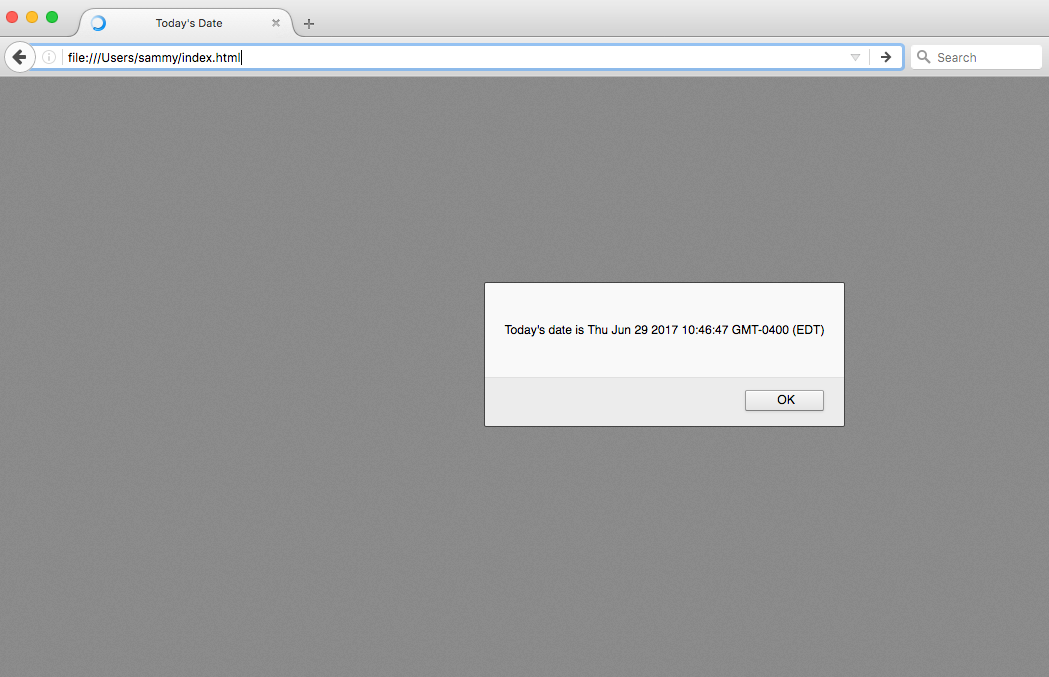
This will enable the webpage to display an alert with the current date regardless of when the user loads the site.

In order to achieve this, we will add a <script> tag along with some JavaScript code into the HTML file.

To begin with, we’ll add the JavaScript code between the <head> tags, signalling the browser to run the JavaScript script before loading in the rest of the page. We can add the JavaScript below the <title> tags, for instance, as shown below:

index.html

<!DOCTYPE html>
<html lang="en-US">
 
<head>
    <meta charset="UTF-8">
    <meta name="viewport" content="width=device-width, initial-scale=1">
    <title>Today's Date</title>
    <script>
        let d = new Date();
        alert("Today's date is " + d);
    </script>
</head>
 
<body>
 
</body>


</html>

Once you load the page, you will receive an alert similar to this:
If we were modifying what is shown in the body of the HTML, we would need to implement that after the <head> section so that it displays on the page, as in the example below:

index.html

<!DOCTYPE html>
<html lang="en-US">
 
<head>
    <meta charset="UTF-8">
    <meta name="viewport" content="width=device-width, initial-scale=1">
    <title>Today's Date</title>
</head>
 
<body>
  
  <script>
      let d = new Date();
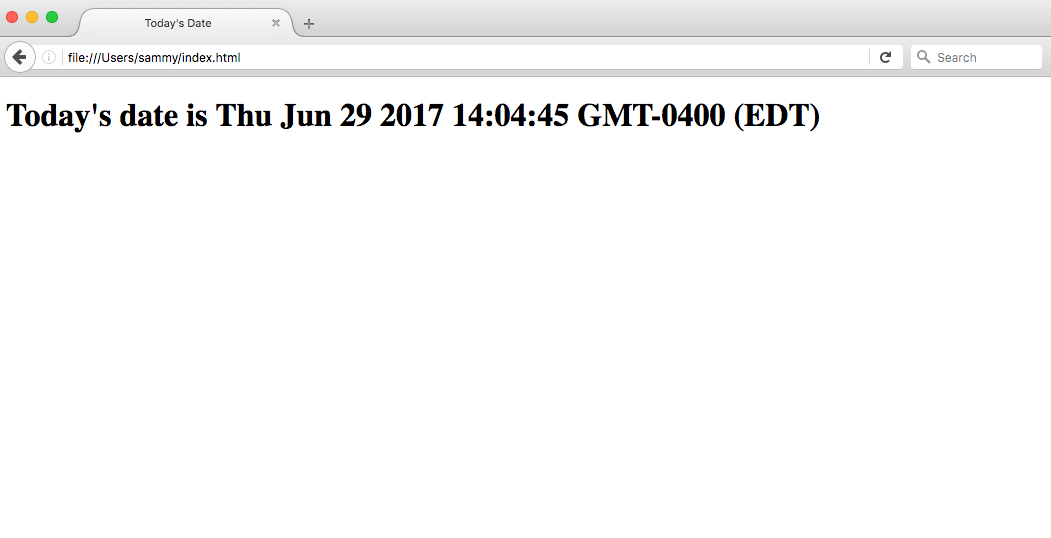
      document.body.innerHTML = "<h1>Today's date is " + d + "</h1>"
  </script>
 
</body>
 
</html>

The output for the above HTML document loaded through a web browser would look similar to the following:
Scripts that are small or that run only on one page can work fine within an HTML file, but for larger scripts or scripts that will be used on many pages, it is not a very effective solution because including it can become unwieldy or difficult to read and understand. In the next section, we’ll go over how to handle a separate JavaScript file in your HTML document.

In order to accommodate larger scripts or scripts that will be used across several pages, JavaScript code generally lives in one or more js files that are referenced within HTML documents, similarly to how external assets like CSS are referenced.

The benefits of using a separate JavaScript file include:

  • Separating the HTML markup and JavaScript code to make both more straightforward

  • Separate files makes maintenance easier

  • When JavaScript files are cached, pages load more quickly

To demonstrate how to connect a JavaScript document to an HTML document, let’s create a small web project. It will consist of script.js in the js/ directory, style.css in the css/ directory, and a main index.html in the root of the project.

project/
├── css/
|   └── style.css
├── js/
|   └── script.js
└── index.html

We can start with our previous HTML template from the section above: index.html

<!DOCTYPE html>
<html lang="en-US">
 
<head>
    <meta charset="UTF-8">
    <meta name="viewport" content="width=device-width, initial-scale=1">
    <title>Today's Date</title>
</head>
 
<body>
 
</body>
 
</html>

Now, let’s move our JavaScript code that will show the date as an <h1> header to the script.js file: script.js

let d = new Date();
document.body.innerHTML = "<h1>Today's date is " + d + "</h1>"

We can add a reference to this script to the <body> section, with the following line of code:

<script src="js/script.js"></script>

The <script> tag is pointing to the script.js file in the js/ directory of our web project.

Let’s consider this line in the context of our HTML file, in this case, within the <body> section:

index.html

<!DOCTYPE html>
<html lang="en-US">
 
<head>
    <meta charset="UTF-8">
    <meta name="viewport" content="width=device-width, initial-scale=1">
    <title>Today's Date</title>
</head>
 
<body>
 

<script src="js/script.js"></script>

</body> 
 
</html>

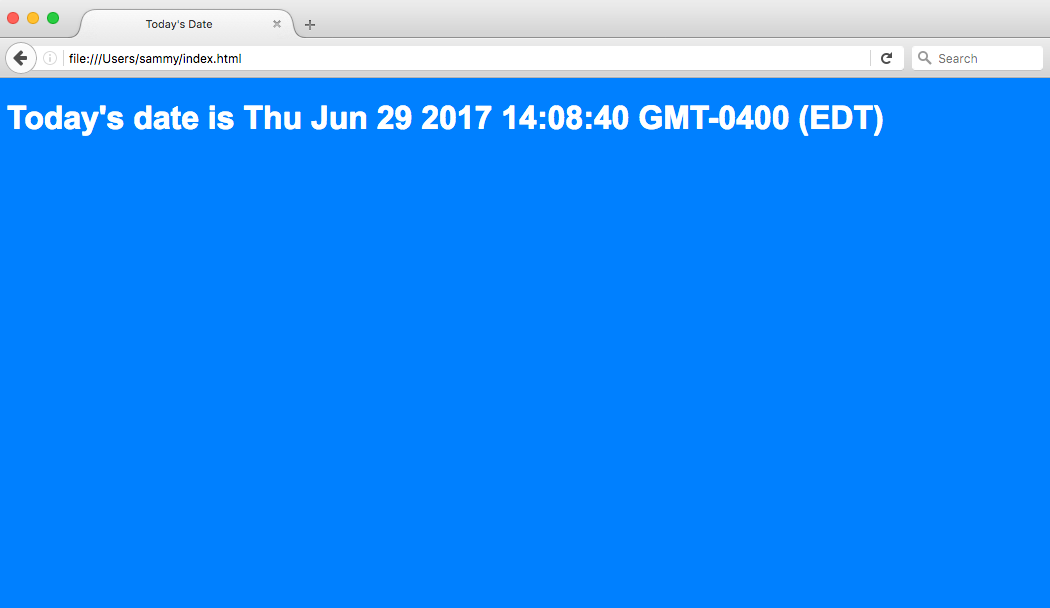
Finally, let’s also edit the style.css file by adding a background color and style to the <h1> header:

style.css

body {
    background-color: #0080ff;
}
 
h1 {
    color: #fff;
    font-family: Arial, Helvetica, sans-serif;
}

We can reference that CSS file within the <head> section of our HTML document:

index.html

<!DOCTYPE html>
<html lang="en-US">
 
<head>
    <meta charset="UTF-8">
    <meta name="viewport" content="width=device-width, initial-scale=1">
    <title>Today's Date</title>
    <link rel="stylesheet" href="css/style.css">
</head>
 
<body>
 

<script src="js/script.js"></script>

</body>
 
</html>

Now, with the JavaScript and CSS in place we can load the index.html page into the web browser of our choice. We should see a page that looks similar to the following:
Now that we’ve placed the JavaScript in a file, we can call it in the same way from additional web pages and update them all in a single location

This tutorial went over how to incorporate JavaScript into your web files, both inline into an HTML document and as a separate .js file.

JavaScript Alert Example
JavaScript Date Example

JavaScript Date with CSS Example

From here, you can learn how to work with the

📗
JavaScript Developer Console
Introduction
Adding JavaScript into an HTML Document
Working with a Separate JavaScript File
Conclusion